Adding Research Data and Visuals in Videos Using CapCut’s Overlay Feature
Creating engaging videos that showcase research data and visuals can be tough without the right tools. CapCut’s overlay feature simplifies this process. This feature lets you easily add visuals and data to your videos, creating professional-grade content that captures your audience's attention.
This blog will guide you on effectively using CapCut’s overlay feature. You will learn to incorporate text, images, and videos into your projects. With video editing software like CapCut, enhancing your presentations becomes straightforward. Get ready to elevate your video content and keep your viewers engaged. Dive into the full blog to discover all the tips and tricks!
Importance of Adding Research Data and Visuals to Videos
Adding research data and visuals to videos is essential for effective communication.
Improves Comprehension: Visuals simplify complex topics, making them easier to understand. For instance, statistical trends and scientific processes benefit from clear graphics that highlight key points.
Engages the Audience: Incorporating visuals breaks up monotony, keeping viewers interested. Features like auto-captions enhance accessibility, ensuring everyone can follow along.
Enhances Professionalism: Videos with data and visuals appear more credible and polished, reflecting a higher quality standard.
Ideal for Educators and Professionals: Those teaching complex subjects or presenting reports can significantly improve their effectiveness using visuals.
In summary, integrating research data and visuals into videos not only aids understanding but also captivates the audience, enhances professionalism, and supports effective teaching and presentations.
Why Use CapCut’s Overlay Feature for Research Data and Visuals?
CapCut's overlay feature is a powerful tool for enhancing research data and visuals in video projects. Here’s why it stands out:
Ease of Use: CapCut has a simple interface, perfect for beginners. The drag-and-drop functionality makes adding overlays easy.
Advanced Customization Options: Add images, graphs, or video clips as overlays. Adjusting transparency, size, and position helps create a polished look.
Efficient Editing Workflow: This feature lets you directly integrate research visuals into your videos. You can edit both videos and visuals at the same time without switching tools.
Free vs. Paid Features: CapCut offers free features like auto-captions and video background remover. However, advanced tools such as filters and transitions may require payment.
CapCut's overlay feature enhances visual storytelling and streamlines the editing process, making it an ideal choice for researchers and content creators.
Steps to Add Research Data and Visuals in Videos Using CapCut
Install CapCut from the Official Website
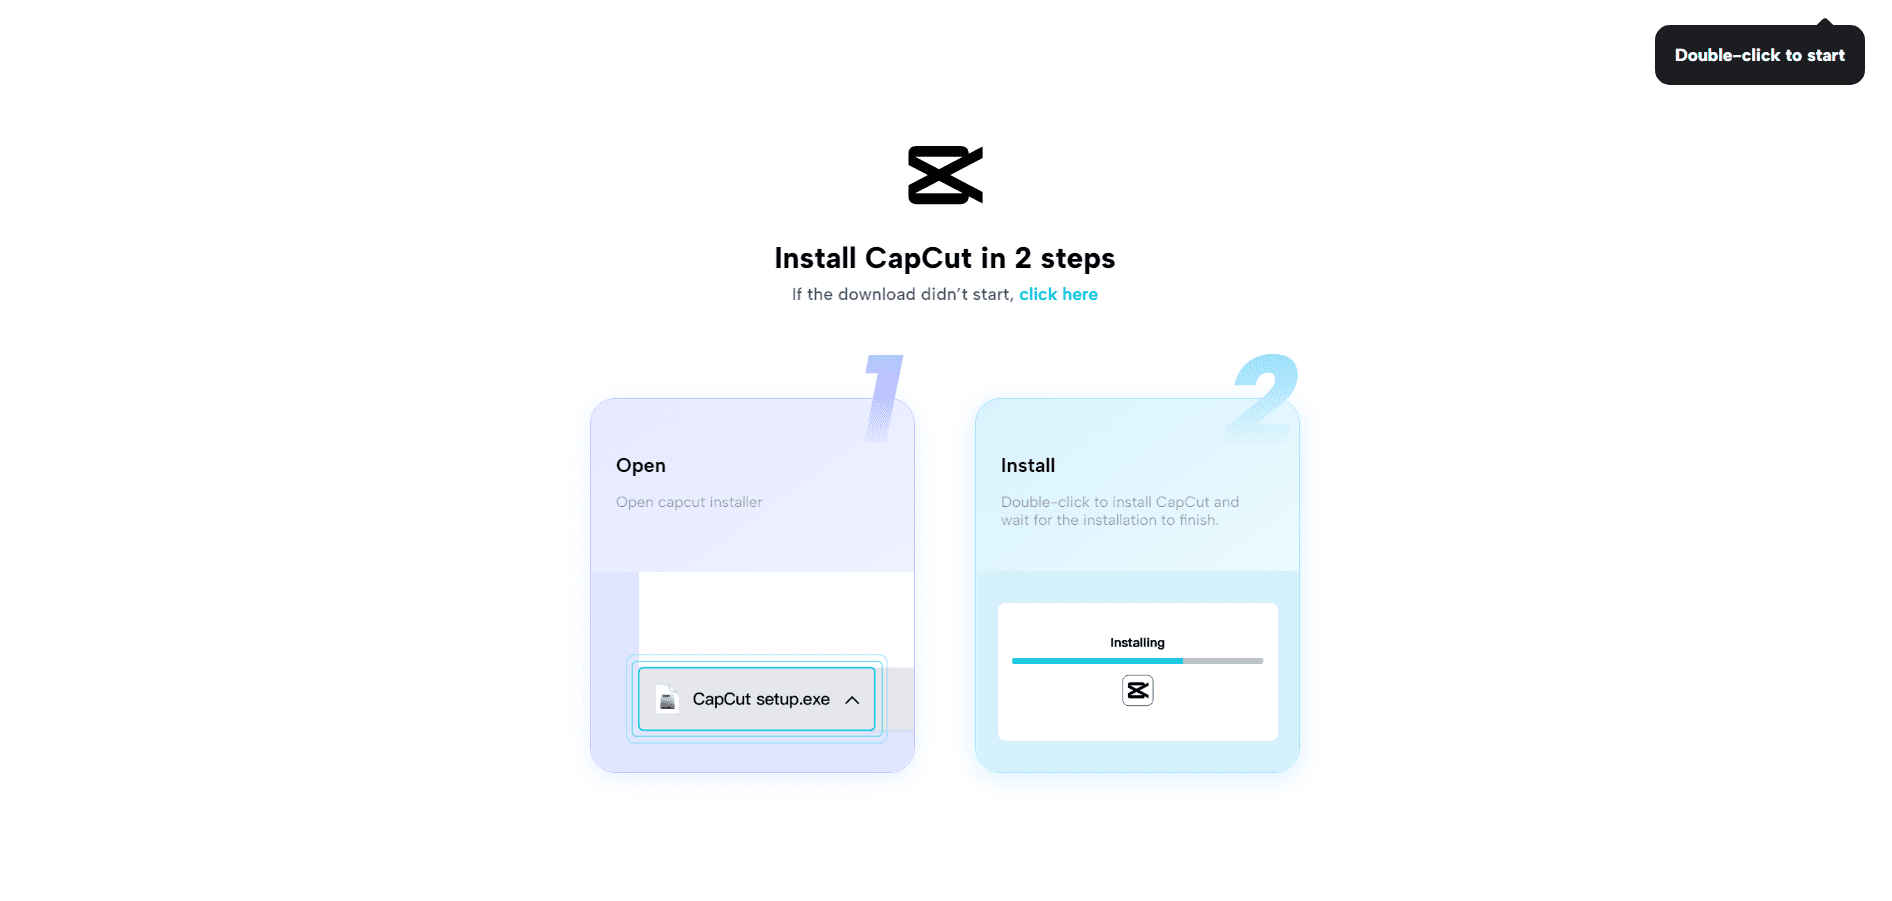
To install CapCut, the first step is to head to the official CapCut website. Look for the download button and click on it to begin downloading the software. Open the downloads folder and double-click the setup program when the download is complete. Follow the prompts to install CapCut on your computer.
After installation, launch CapCut. You will need to sign up for an account to access all features. You can use your email or sign in with Google or TikTok. Signing up helps you avoid watermarks on your videos.
Now, you are ready to create and edit videos using CapCut. Explore its features and enjoy making your content shine!
2. Import Your Video
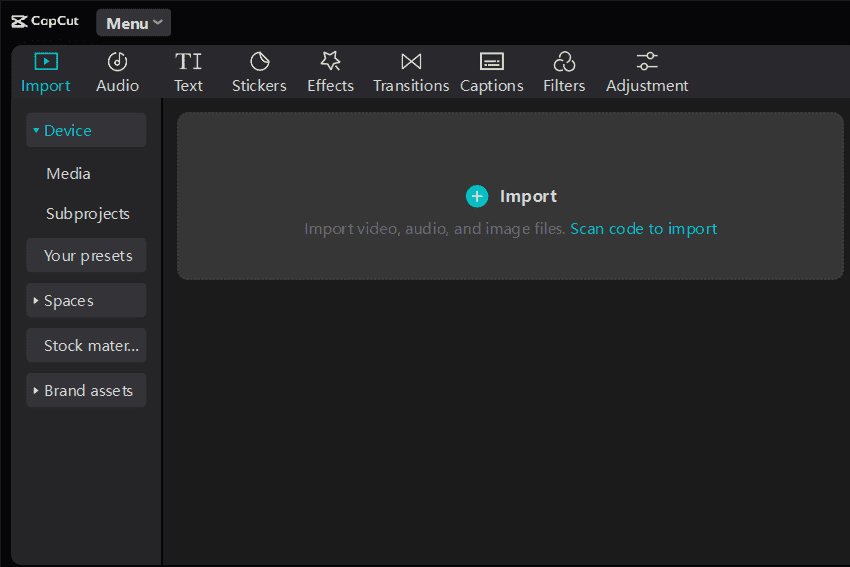
To import your video into CapCut Desktop Video Editor, start by opening the app. Select the "Create Project" button to start the process. There will be an "Import" button on the left side of the screen. Press this button to open the file browsing window. Locate the video file you want to edit and select it. Once selected, click "Open" to transfer the video into CapCut.
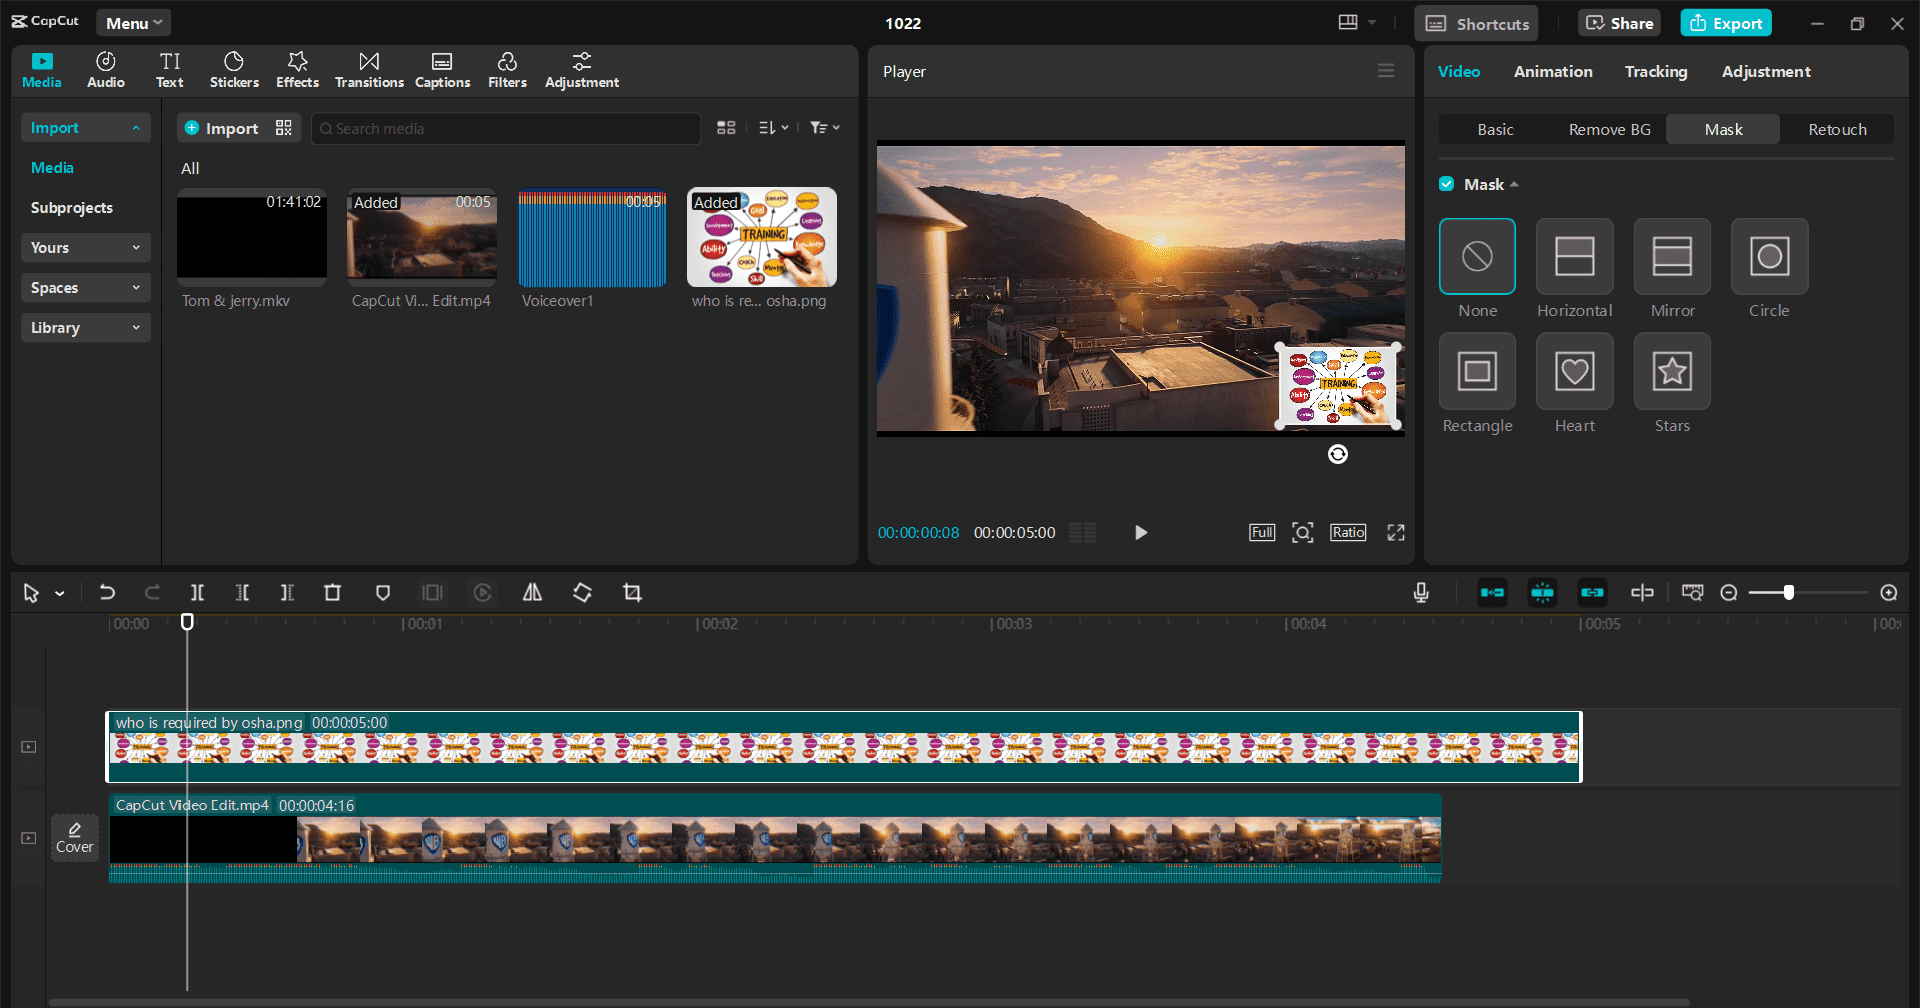
Once your video appears in the media library, drag it down to the timeline at the bottom of the screen. This action allows you to start editing your video. Feel free to cut, trim, or insert effects as needed. When finished, click the "Export" button to save your edited video. Enjoy creating!
3. Add Overlays
To add overlays in CapCut Desktop Video Editor, follow these simple steps:
Pick the "Overlay" option from the toolbar to initiate.
Import the visuals, such as images or charts, you want to use.
Move and place the overlay on the timeline that suits your video content.
Use customization tools to resize, reposition, and adjust transparency.
Pair overlays with tools like video background remover to keep your visuals clear and focused.
Finally, apply transitions and effects to enhance the appeal of your overlays.
These steps will help you create engaging videos by effectively using overlays in your projects. Enjoy editing!
4. Finalize and Export Your Video
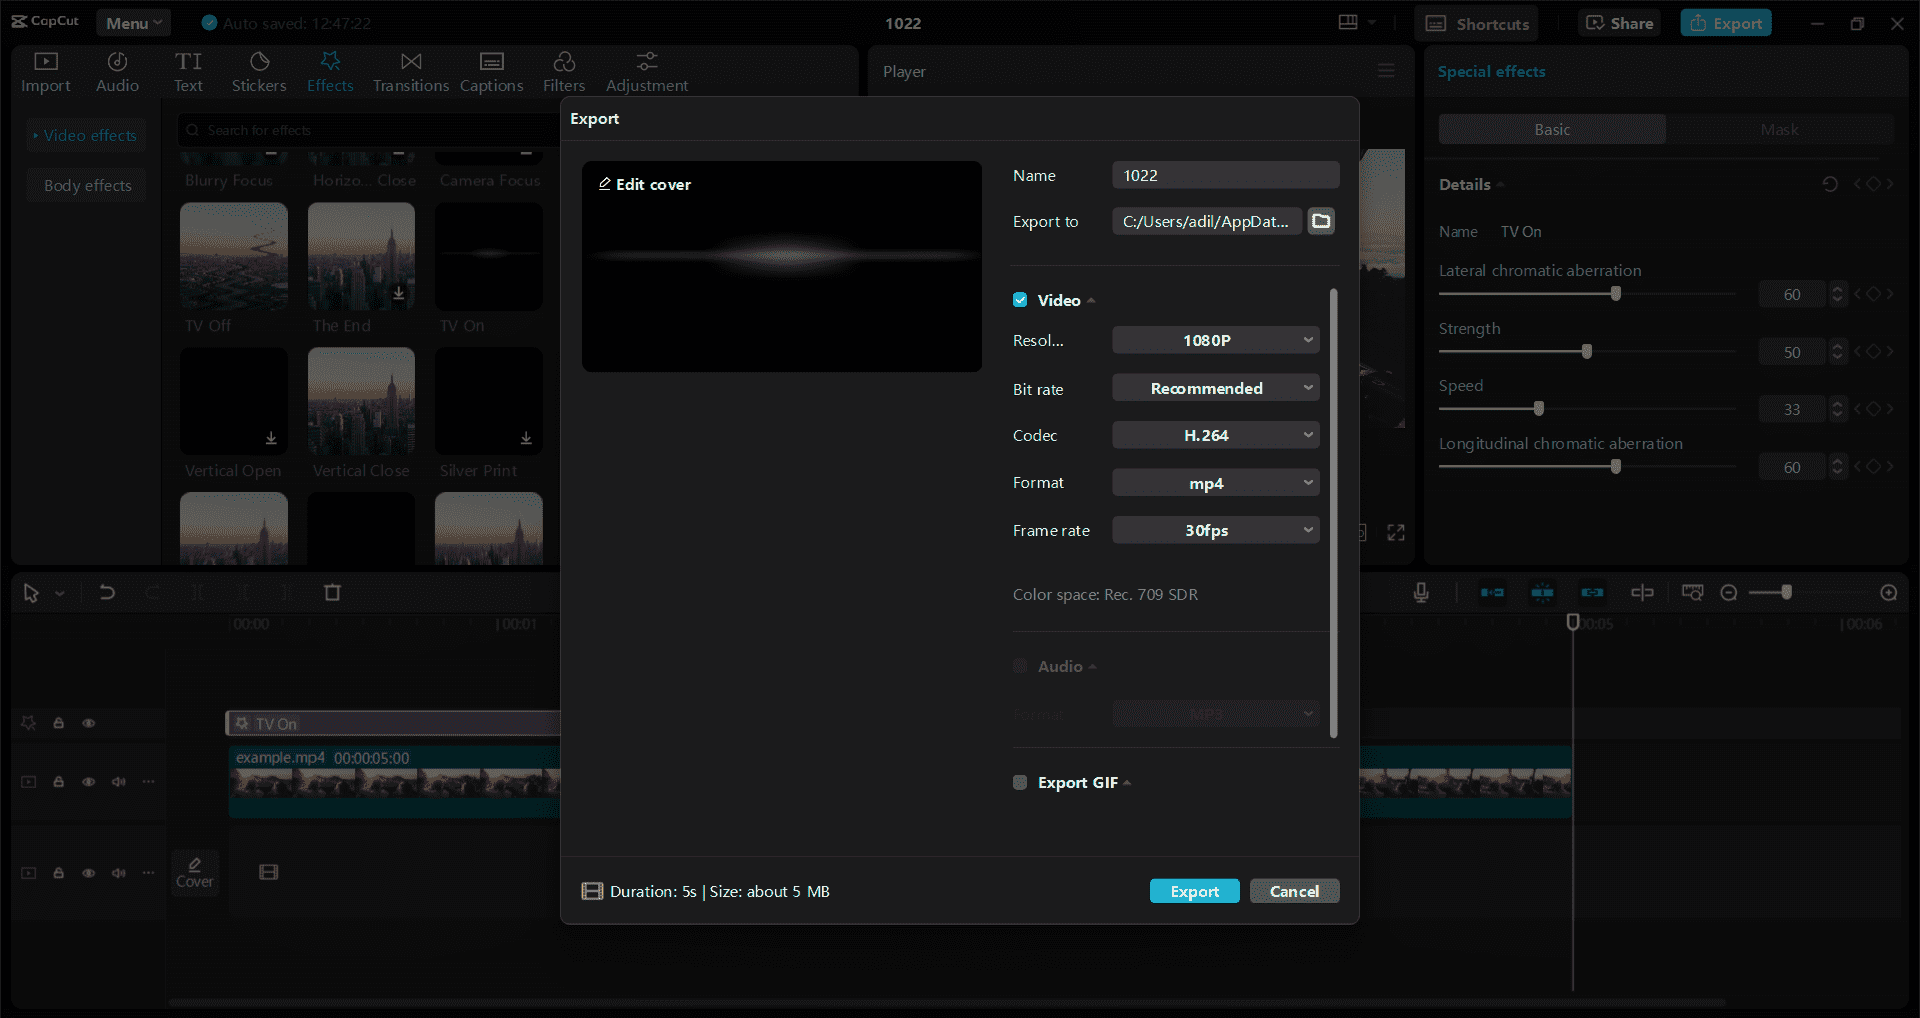
To finalize and export your video in CapCut, start by reviewing your project. Check that all visuals and data align well. After you're satisfied, click the Export button at the top right. A menu will appear where you can set the video title and choose the save location.
Select your desired resolution, format, and frame rate. Common formats include MP4 and MOV. After adjusting these settings, click Export again to save your video. Your project will now be ready for sharing or uploading to social media platforms like TikTok or YouTube.
Wrapping Up
CapCut’s overlay feature offers significant benefits for enhancing research data and visuals. By enriching videos with layers of information, users can create insightful and visually appealing content. Pairing visuals with tools like auto-captions ensures viewers grasp essential points without distractions.
The video background remover feature also allows for a clean presentation, focusing attention on the key content. This combination helps produce engaging and professional videos that stand out. Users should try these features in their next project to see how they can boost viewer engagement and overall professionalism. While some advanced features may require payment, the quality of results justifies the investment.


